Fold a paper mountain for a Christmas toy scene
Give a firm paper strip four folding panels, then cut broad peaks along the top. Test the standing backdrop before adding toys and keep their route in front.
Make a backdrop from one connected strip
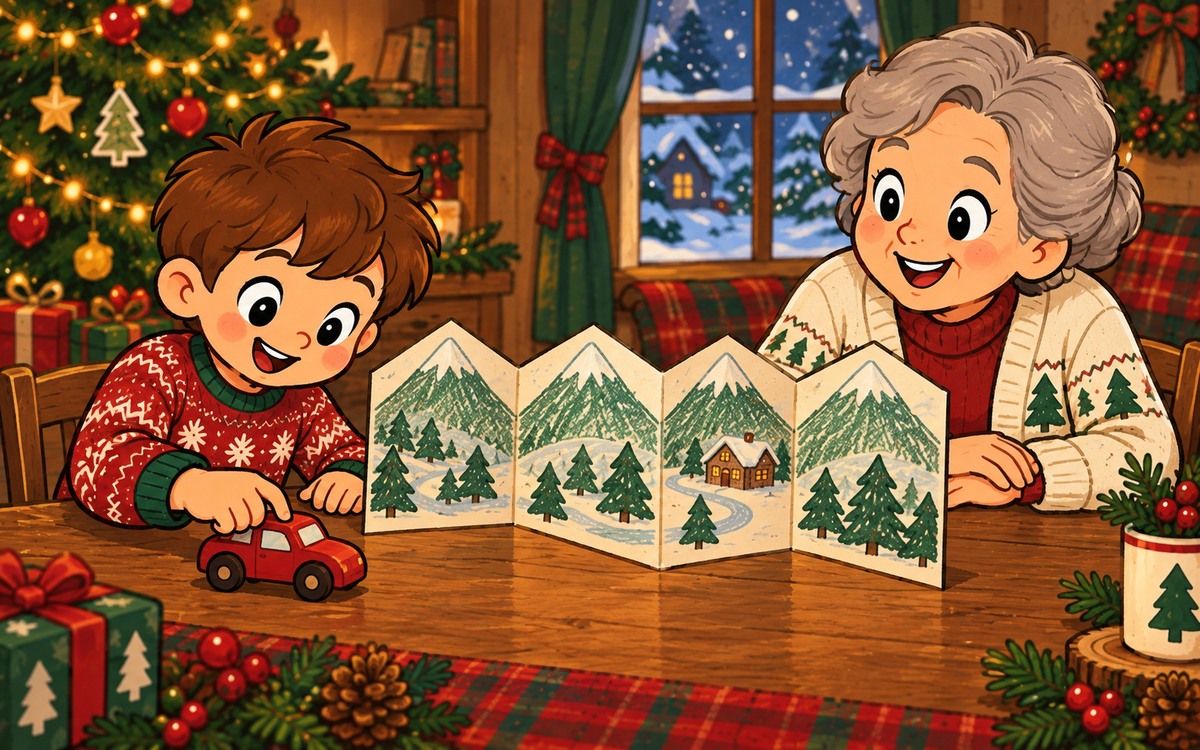
A folded paper mountain can stand behind a small Christmas toy scene. The strip stays connected along the bottom, while alternating folds give it a zigzag footprint on the table. Your child can add a toy in front and invent a journey past the mountains.
Use firm paper, a pencil, a ruler if helpful, crayons and scissors. Choose a broad strip long enough for four panels that your child can fold comfortably. Thin floppy paper may need replacing with a firmer sheet.
Fold four panels before shaping the peaks
Lay the strip with its long edges across the table. Mark three upright lines that divide it into four roughly equal panels. Fold along the first line towards you, the second away from you and the third towards you. Press each crease, then open the strip again.
Stand it on the long lower edge with the folds partly open. From above, the bottom edge should make a zigzag rather than a straight line. Release your hands briefly to see whether it stands. Open or close the folds a little until the panels support one another.
Put the strip flat again. In the upper third of each panel, draw one broad mountain peak. The low points between peaks must stay in that upper area, leaving a wide uncut band below. Cut the outline with adult help where needed. Do not cut down to the bottom edge or separate the panels.
Colour the slopes and test the folds
Shade the mountain slopes green or blue. Leave a pale patch near each tip if your child imagines snow. The mountain does not need tiny windows or a detailed village to become a useful background.
Stand the strip again along its uncut lower edge. Check that the folds still make a stable zigzag. If it falls, adjust the angles or try a lower strip of firmer paper. Keep the broad connected base when changing the outline.
Leave a clear route for the toy
Set one toy on the table in front of the mountains. Leave enough space to move it without bumping the paper. Keep the toy on the tabletop throughout the journey; the folded strip provides the scenery.
Your child might take a pretend Christmas delivery from one end of the scene to the other. Let them choose where it starts and stops, then try the route once. If a fold gets knocked over, pause the toy and reset the backdrop.
After the scene, open the folds gently and store the strip flat. You can stand it again another day, or finish after that one short journey.
OUR FOLDED MOUNTAIN
Four connected panels: ______
Three alternating folds: ______
Broad lower band left uncut: ______
Standing zigzag tested after cutting: ______
Toy route stays clear in front: ______
Pretend journey begins / ends: ______ / ______
Strip opened gently for flat storage: ______