Make a paper-cup forest for a Christmas story
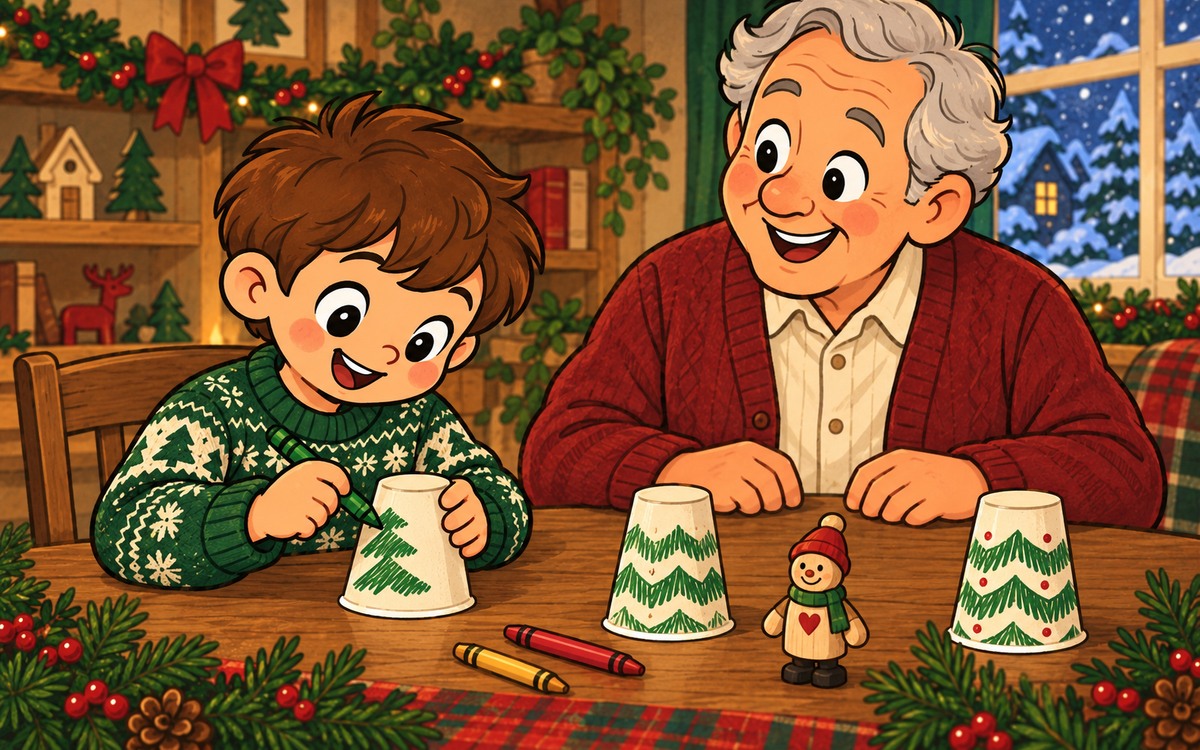
Turn three clean paper cups upside down, add simple tree marks and leave a path between them. Check that your little forest can stand and pack away again.
Check the cups before decorating
Three clean, empty paper cups can become a small Christmas forest. Their wide rims form the bases, so each tree can stand without a separate support. Your child can rearrange the forest for a story and put it away afterwards.
Choose dry cups with intact rims and no soft or torn sides. If you want to store them together, try nesting them before doing any drawing. Matching cups may fit; different sizes may need separate storage. There is no need to buy a pack for this activity.
Give each cup a tree pattern
Turn the first cup upside down on a flat table. Make a small test mark on its outside with a coloured pencil or crayon. If the mark stays, your child can draw broad green branch lines around the sides. The narrow closed end becomes the top of the tree, while the wide open rim stays on the table.
Keep the rim clear so it rests evenly. Simple lines or patches are enough; the picture does not need a pointed top or individual needles. Repeat on the other cups, choosing a different branch pattern if your child wants to tell the trees apart.
If the surface will not take a mark, leave the cups plain and draw green patches on a paper base beneath them. You can still use the cups as pretend trees. Loose glitter, stuck-on ornaments and wet paint are not needed for this version.
Leave a route through the forest
Set the three cups apart on the table or paper base. Ask your child to leave a clear path for a familiar toy figure. Move the figure along it once: can it pass without knocking a cup over? Make the gap wider if necessary.
Your child can give the journey a Christmas reason, such as carrying an imaginary card to a house beyond the trees. Rearranging one cup can open a new route. Keep the focus on where the character can go rather than filling every empty space with another decoration.
Pack away the trees together
When the scene is finished, remove the toy and look at the cups. Check that any marks are dry and do not rub off before nesting the cups gently. If they catch or resist, stop and store them separately; forcing them together can spoil the shape.
Keep the paper base flat beside them if you used one. Next time, your child can spread out the same trees and choose a different path. A small forest with one usable route is already a complete setting.
OUR CUP FOREST
Cups stand steadily: yes / adjust
Outside marks stay in place: yes / use paper base
Toy can pass between trees: yes / widen path
Our Christmas journey: ______
Cups nest gently: yes / store separately
Paper base kept flat: ______