Make a Christmas card with one V-fold that closes properly
A V-fold lifts a separate paper piece as a card opens. For a first Christmas version, keep the moving piece small and draw your own tree on it. Build and check the mechanism before adding decoration. A card that looks good while open still needs to close without buckling or leaving the tree outside its edges.
Prepare a folded blank card, thin paper for the moving piece, scissors, a ruler and suitable adhesive. An adult should handle tools as needed. Use a plain trial piece first and check that the small body fits inside your card before gluing.
Carol Barton’s V-fold instructions, page 3 show how the tabs are attached one at a time. Keep that illustrated reference beside you while making the small rectangular version below.
Separate the moving shape from its glue tabs
Draw a rectangle 6 cm wide and 5 cm high. Reserve the bottom 1 cm as a glue strip; the upper 4 cm is the moving body. Mark a vertical center crease and the horizontal line above the glue strip.
Cut out the rectangle. Fold the body at its center and fold the bottom strip along its marked line. Cut only the glue strip at the center so it becomes two independent tabs. Do not continue that cut up the moving body. The body’s center crease meets its baseline at a right angle.
Position the hinge point on the card’s spine
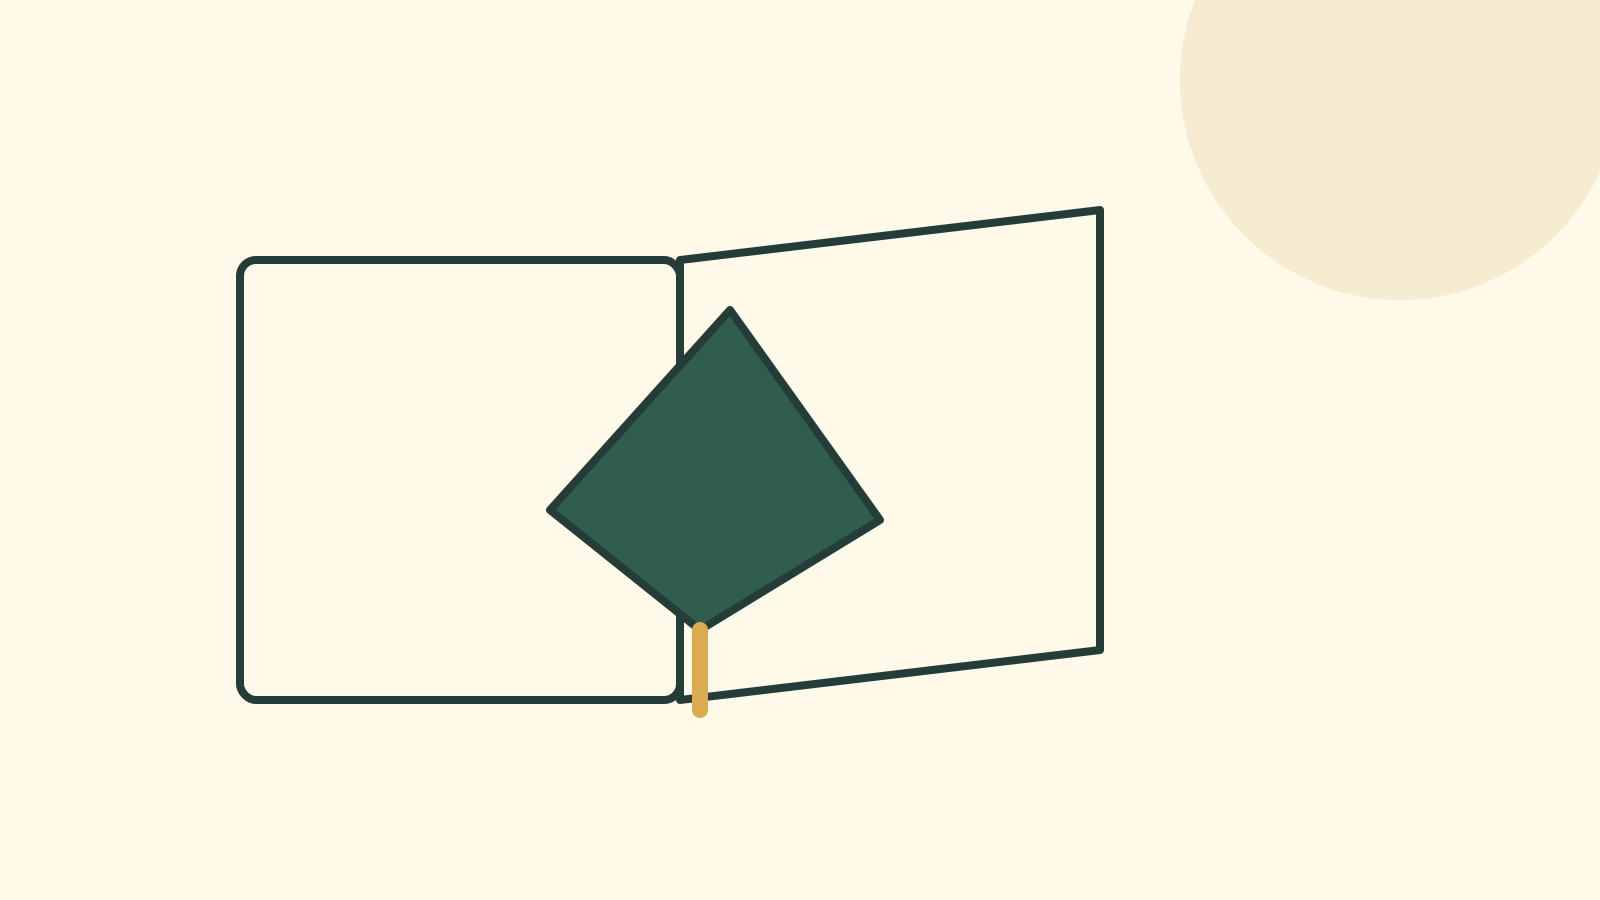
Open the card flat, inside facing up. Fold the moving body in half so its two 3 cm-wide halves lie together. Unfold the tabs away from the body: they must be available for attachment, not tucked between those halves. Lay the folded piece on one inside half of the card. Put the point where its center crease meets the tab crease exactly on the card’s spine. Turn the folded piece so its center crease runs diagonally into that half of the card. Keep the entire body inside the card’s edges.
Check that position without glue by gently closing the card around the piece. If the body extends beyond the card, reduce it or move its hinge point. Do not trim the glue tabs away just to make it fit.
Attach one tab, then transfer the other
Keep the folded body in place and identify the exposed tab: its upward-facing outer surface will meet the inside of the card half you close over it. Put adhesive on that surface only. Close the free card half onto it, keeping the hinge point on the spine. Press over the tab and let the adhesive set. The two body halves must remain free of glue.
Reopen the card carefully. Fold the moving body flat against the card half now attached to the first tab. The remaining tab should now expose its outer contact face to the other card half. Add adhesive to that exposed face, then close the other half onto it. Let the card itself transfer the position; do not glue the second tab independently on the open card. Keep the hinge point on the spine, and keep glue off all moving creases. Wait for the adhesive to set before opening.
Open and close slowly
| What you see | What to check |
|---|---|
| Body buckles | Tab positions, symmetry and unwanted glue |
| Shape projects beyond the card | Clearance in the fully closed position |
| One tab lifts | Adhesive contact and drying |
| Piece stays flat | Whether the body crease and separate tabs can move |
Do not force a stuck mechanism. A badly placed tab may need a new trial rather than more pressure. Check again after each repair.
Draw the Christmas tree last
Use the moving rectangle as the surface for your original tree drawing. Avoid heavy additions that bind the fold. Add the greeting to the fixed card area and repeat the open-and-close check after decorating.
The finished result is a moving V-fold fully contained in the closed card. Keep the successful dimensions and attachment position for your own paper, while rechecking whenever the material or shape changes.
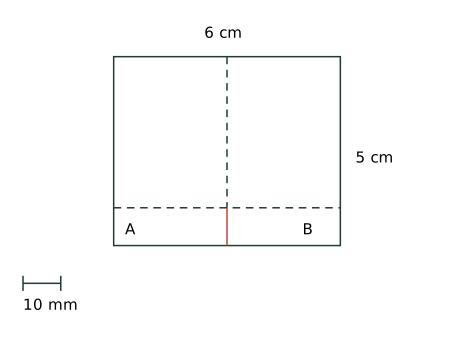
Print at 100% and check the calibration ruler. This dimensional guide has not been physically trialled.