Cut a matching pair of paper Christmas mittens
Cut two loose mitten shapes from a folded sheet, turn one over and decorate each differently. Their outlines match even when the Christmas patterns do not.
Draw one complete mitten outline
A pair of paper mittens gives your child two matching shapes to decorate in different ways. You can make both from one folded sheet, then turn one over for a left-and-right display. They are paper decorations, not gloves to wear.
Fold a plain sheet in half and lay it flat. On the top layer, draw a broad mitten with a rounded end for the fingers, one wide thumb at the side and a straight wrist edge. Keep the whole outline away from the sheet's fold and outer edges. It must fit entirely on the doubled area.
Cut two separate shapes
Hold the layers together and cut around the complete outline. An adult can help where the thumb curves into the mitten. Do not leave an edge attached to the main paper fold: the aim is two separate pieces, not one joined shape.
If cutting two layers is awkward, unfold the sheet and cut the drawn shape first. Place it on another piece of paper and trace around it. Cut that second outline separately. You will still have a pair based on the same pattern.
Put the shapes on top of each other to compare them. Small differences at a corner do not need fixing. If one has a large extra edge that stops them lining up, adjust that edge before coloring.
Turn one mitten over before decorating
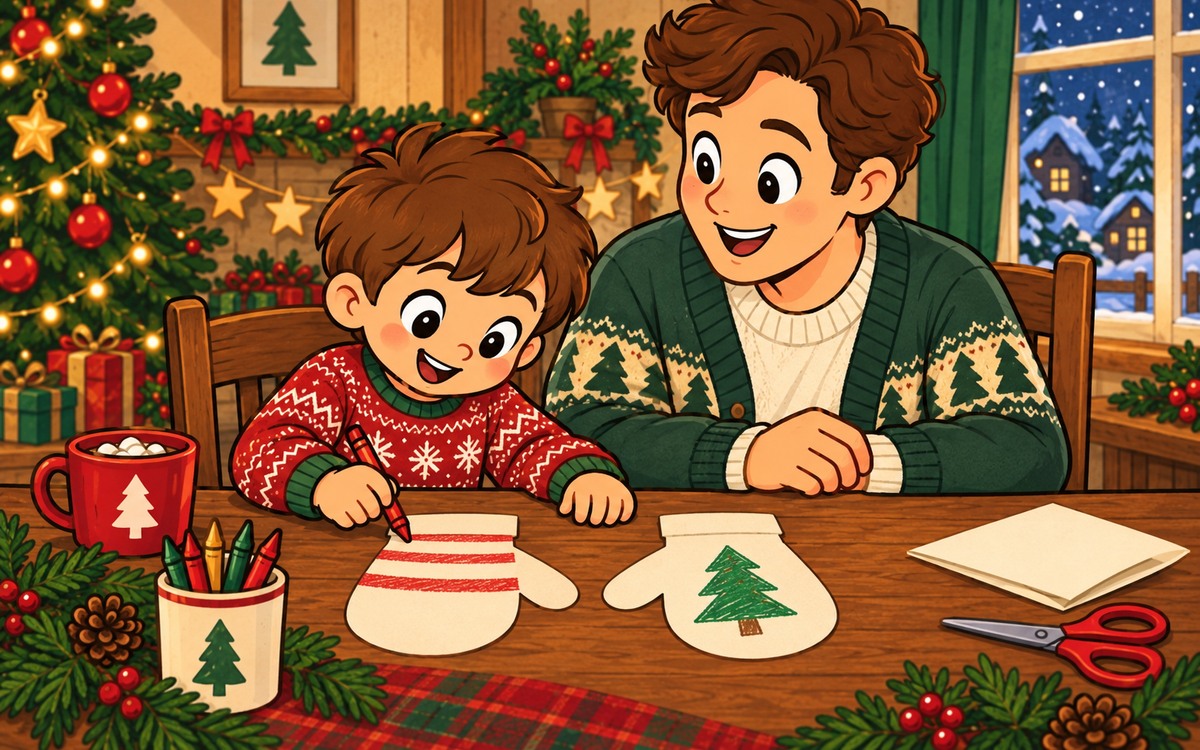
Place the mittens side by side with their wrists level. Turn one over so the thumbs point towards each other. Decide which upward-facing sides you will decorate now; flipping a finished one later could hide its picture.
Your child can draw red bands across one mitten and a green tree on the other, or choose two patterns of their own. Keep the decoration on the paper rather than adding heavy objects. The outline makes them a pair; their pictures do not have to be identical.
Try a simple cuff line near each wrist if your child wants a shared detail. A few marks are enough to show the difference between the two decorations.
Choose a place for the pair
Lay the finished mittens on a larger sheet or the front of a card before attaching them. Check that both shapes fit and that the thumbs still face each other. Glue them flat only when your child likes the arrangement.
You can also leave them loose and keep them in an envelope. Ask which pattern belongs to which mitten, or let your child invent who might wear the pretend pair. One finished pair is enough; extra sizes and a whole washing line are optional.
OUR PAPER MITTEN PAIR
Whole outline stays away from fold: ______
Two separate pieces: ______
One mitten turned over before decorating: ______
First pattern: ______
Second pattern: ______
Place for our finished pair: ______