Fold a one-sheet Christmas storybook with your child
Fold a small Christmas book, then draw or dictate a story across its six inside pages. Includes page prompts, a fictional example, and Letter and A4 templates.
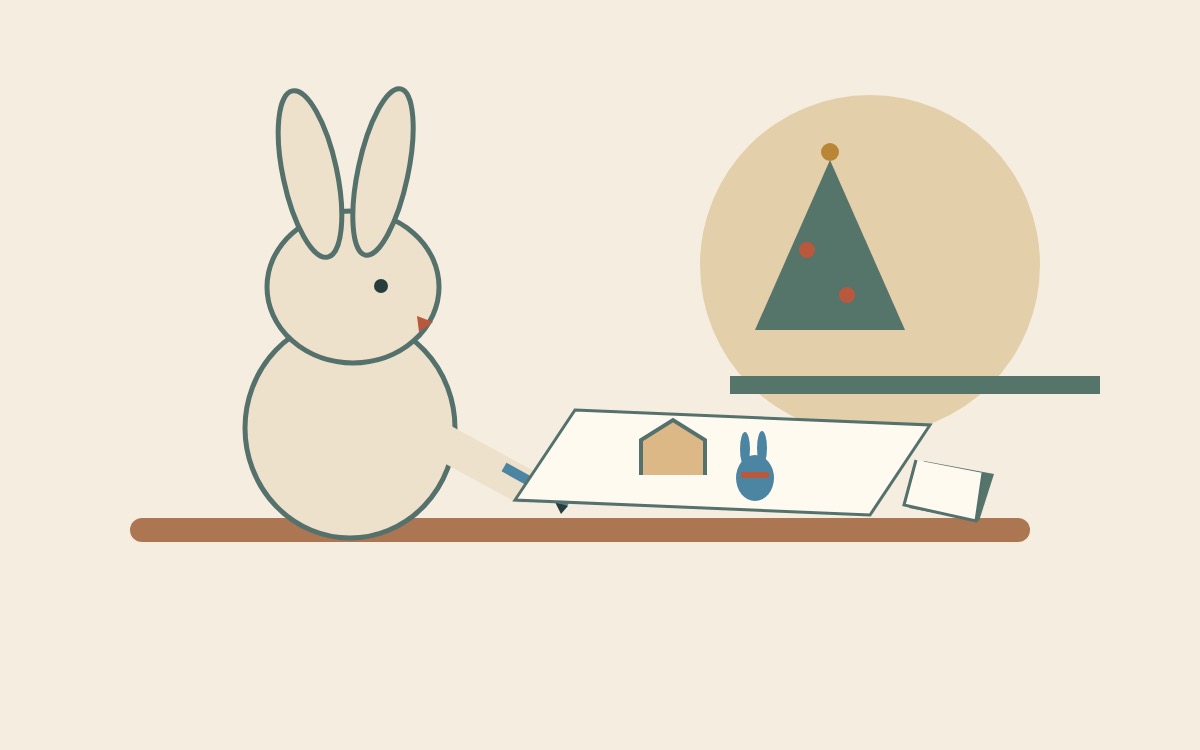
Draw a character, give them a small Christmas adventure, and fold the story into a book to keep. One sheet makes eight pages: a front cover, six story pages, and a back cover.
Start with a character: perhaps a rabbit making a Christmas picture, or a toy waking up beside a decorated shelf. Ask your child what happens next, then give each part its own little page.
Your child can draw the whole story, add a few words, or dictate words for you to write. Fold the book first so you can see the reading order before filling it. Use plain paper or the printable, which has page labels, fold guides, and a marked central cut.
Put one sheet and a few drawing tools on the table
Gather one sheet of Letter or A4 paper, pencils or crayons, and scissors for an adult to handle. You do not need tape or staples.
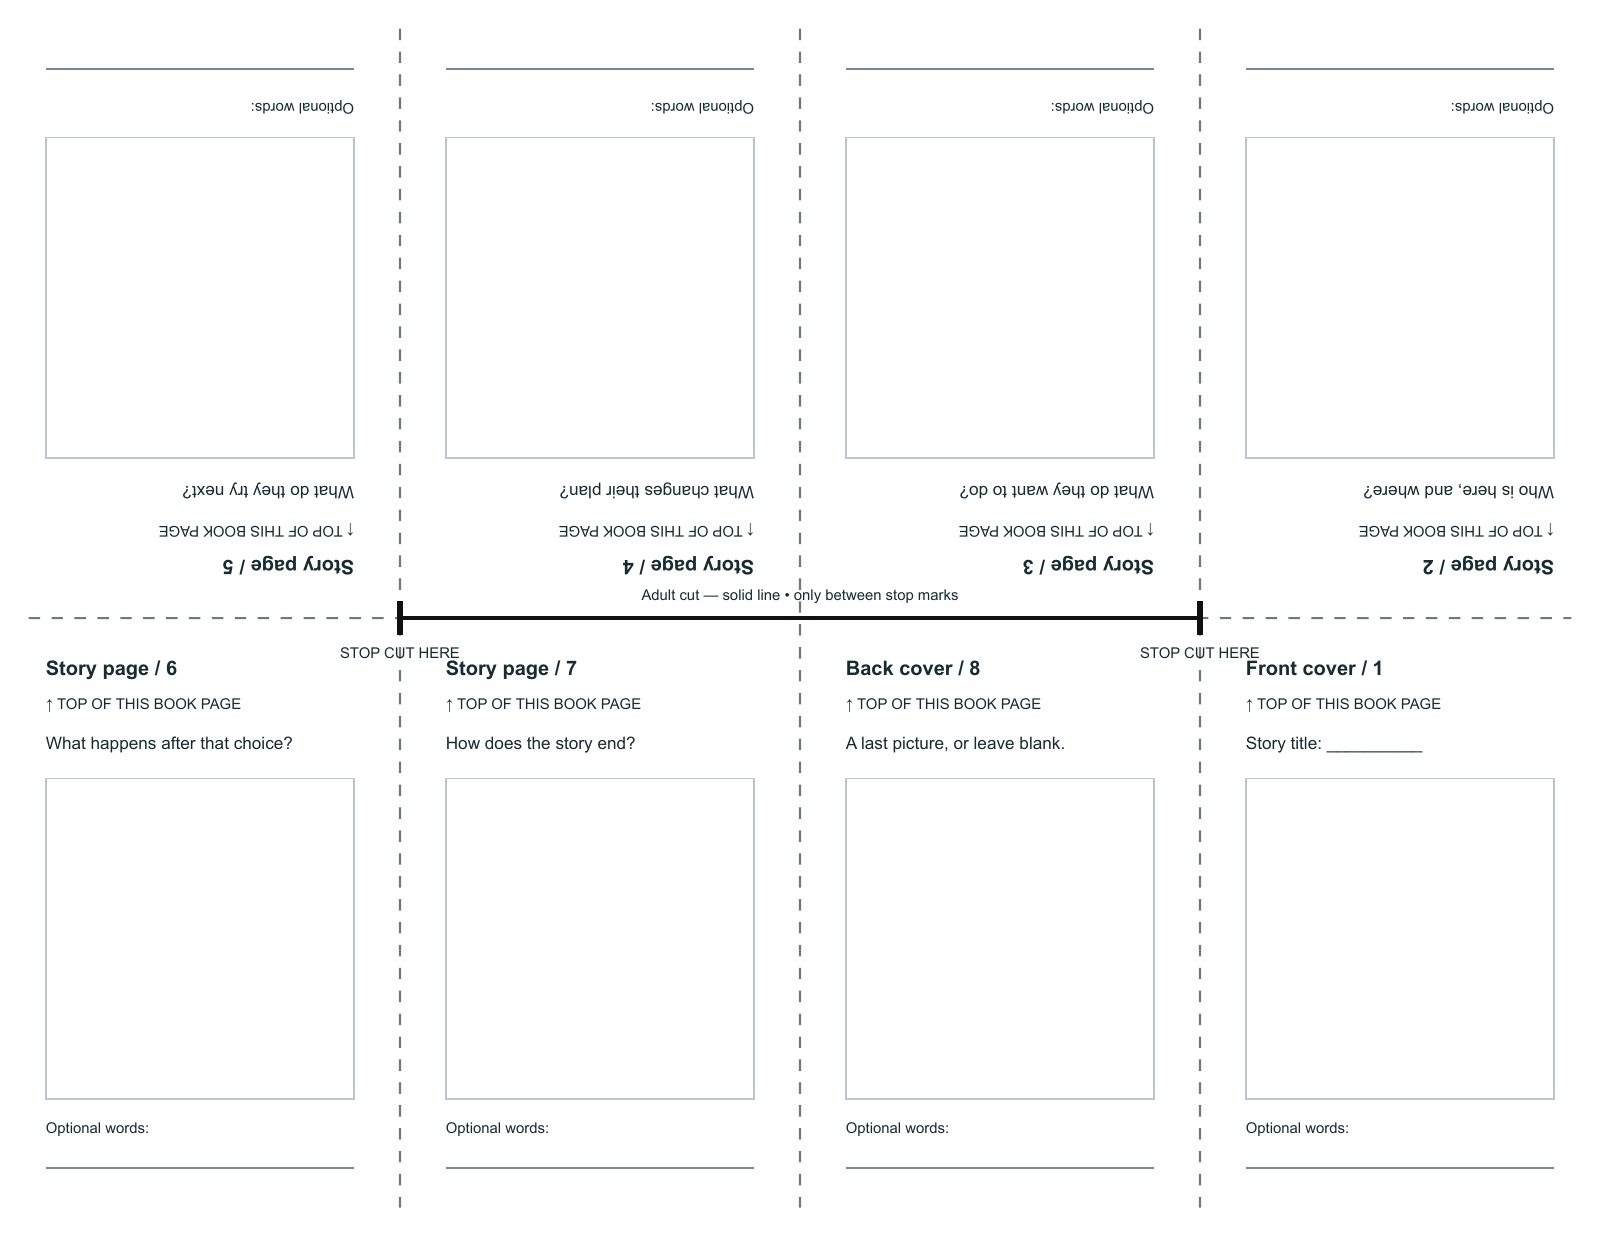
If you print the template, choose the file that matches your paper, print on one side, and select actual size or 100% in the print settings. Check that both cut-stop marks and all page labels are visible before you start. Keep the printed side on the outside when you form the book.
If you are using plain paper, follow the folding and cutting steps below. Once the book is assembled, mark the front cover, six inside pages, and back cover with a pencil. Draw into the assembled book to keep pictures upright.
Make eight panels, then one central cut
Place the sheet horizontally, with its long edges at the top and bottom.
- Make four columns. Bring the left short edge to the right short edge and crease. Fold that folded sheet in half in the same direction again, then open it fully. You now have four equal columns.
- Make two rows. Bring the bottom long edge to the top long edge and crease. Open the sheet. The four columns and two rows make eight panels.
- Find the cut. It runs along the horizontal middle crease, across only the two middle columns. It starts at the first inner vertical crease and ends at the last inner vertical crease. Leave the two outside columns uncut.
- Have an adult make the slit. For scissors, fold the sheet so its two short edges meet again. Start at the midpoint of the folded edge and cut along the horizontal crease only as far as the next vertical crease. Open the sheet and check the slit: it should cover the middle half of the sheet, with paper still joined at both outer ends.
On the printable, cut only the solid line between the two stop marks. The dashed lines are folds. Do not cut across the whole sheet or cut the panels apart.
Push the slit open and close the book
Fold the long edges together again, with the printed side outside if you are using the template. Hold the two short ends of the folded strip and gently push them toward each other. The slit opens in the middle like a diamond.
Keep bringing the ends together until the four pairs of panels meet like the arms of a cross. Fold the arms together into a small book. With the template, arrange it so Front cover / 1 is on the front, the inside pages run from 2 to 7, and Back cover / 8 is last.
Turn through the book before drawing. If a label is upside down or a page is out of order, reopen the book and rearrange the panels before adding your story. On plain paper, choose a front cover and number the assembled pages yourself.
If the strip stays flat when you push the ends, open it and check that the central slit is there. If the sheet has been cut all the way across, use a fresh sheet for this format.
Give the six inside pages a story
Choose a character and a Christmas setting your child wants to draw. A decorated room, a family table, or an entirely imaginary place can be enough. Add snow, a particular Christmas figure, or a celebration date only if they belong in the story you want to tell.
Use these optional prompts in reading order:
- 1 — Front cover: Give the story a title and draw one thing from it.
- 2: Who is here, and where are they?
- 3: What do they want to do?
- 4: What happens that changes their plan?
- 5: What do they try next?
- 6: What happens because of that choice?
- 7: How does the story end?
- 8 — Back cover: Add a last picture, an optional creator name, or leave it blank.
One picture per page is enough. If your child dictates, ask, “What words would you like here?” and write those words. Leave text out if they prefer to tell the story aloud as they turn the pages.
Combine prompts or leave a page just for a picture. Use the six-page sequence as a starting point and let your child change it to suit their story.
A finished example: Rabbit's Christmas Picture
This is an invented story you can copy, change, or replace. It is separate from your family's real Christmas plans.
Front cover / 1: Rabbit's Christmas Picture. Draw Rabbit holding a picture.
Page 2: “Rabbit sat beside the Christmas shelf with paper and a blue pencil.” Draw Rabbit, the paper, and the shelf.
Page 3: “Rabbit wanted to draw a little house under the moon.” Draw the house and a round moon.
Page 4: “Oops! A blue scribble landed beside the house.” Draw a large scribble with Rabbit looking at it.
Page 5: “Rabbit gave the scribble two ears and a striped scarf.” Turn the same scribble into a small creature.
Page 6: “Now the house had a visitor. Rabbit drew a door for the visitor to knock on.” Draw the creature beside the door.
Page 7: “Rabbit put the picture on the Christmas shelf. The unexpected visitor could stay.” Draw the finished picture on the shelf.
Back cover / 8: Draw the blue visitor waving. Add “The end” if you like.
Rabbit turns the unexpected scribble into a visitor who stays in the picture. Your child might choose a different visitor or decide that Rabbit draws something else entirely.
Read it once, then decide what to keep
Turn the pages together from the front cover to the back. Ask your child whether a picture or line is missing from the story they wanted to tell. Add or change it if they wish, or leave the book as it is.
An optional title, creator name, or date can help you recognize the book later. Leave names off if you plan to share it publicly. Store it wherever you keep your child's drawings, or let them choose who hears the story first.
Use the activity without a printer
Follow the folding instructions with a blank sheet and draw into the assembled book. You still have a front cover, six inside pages, and a back cover.
If scissors are unavailable, fold several separate sheets in half and keep them nested as a loose booklet. Draw and tell the story in that booklet instead. It is a different format: the one-sheet eight-page book needs the central cut.
You can also copy the eight page prompts into a notebook. Begin with the character on page 2 and work toward an ending on page 7; add the title when you know what happened.
Open the storybook template
Choose Letter or A4 for the paper you have. The template leaves room for drawings and optional words. The instructions and example are also available in reading order as a text version.
Download the Letter template (PDF) · Download the A4 template (PDF) · Open the storybook instructions and text version
No account or app is needed for this paper activity. Fold the book, choose a character, and ask your child what happens on the next page.
Sources
The National Literacy Trust's mini-book instructions show the one-sheet folding and central-cut method. ReadWriteThink's Stapleless Book describes an eight-page book without tape or staples, including use for picture books. BAnQ's zine workshop guide includes eight-page folded zines and 8.5 × 11-inch paper among its materials.
The Christmas prompts and Rabbit story are our own suggestions. These sources do not evaluate our printable or promise learning outcomes.
Template and reading order
Front cover → pages 2–7 → back cover
 23
23 26
26 27
27